Managing Users in the Virtual Community
When requesting a VC, you will be enrolled as the Owner of the community. This role provides the same access as an Instructor of a course offering with the following additional permissions:
- Ability to add owner(s) (i.e. designate alternate owners).
- Ability to add community members in a Secondary Instructor or Student role. These roles within SLATE have the same permissions as a regular academic course offering.
- Ability to add a demo student via SLATE Self-Service.
- Ability to add and remove members individually.
- Ability to add members through a bulk file import.
Note: Only Owners can enrol users in a virtual community.
Individual Enrolments
Automatic Bulk Enrolments
Manual Bulk Enrolments
Step One: Create an Enrolment File using Excel.
- Create a New File in Excel. For instructions click here.
- Modify the file to include the following information for all users to be enrolled:
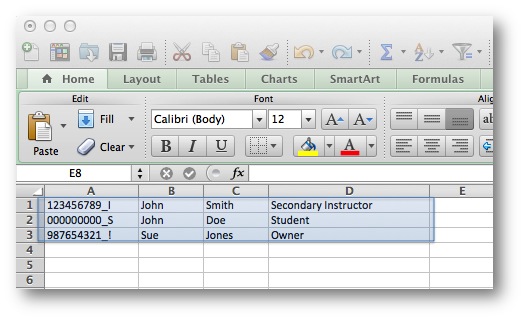
| Field | Value Description | Examples |
| Org Defined ID | Set to the SID of the user and include _S for students or _I for Instructors. | 123456789_I or 000000000_S |
| First Name | The first name of the user as defined by PeopleSoft. | John |
| Last Name | The last name of the user as defined in PeopleSoft | Smith |
| Role | Set to the role you wish the member to have in the community. | Owner, Secondary Instructor, Student |
NOTE: Column headers are not required. A sample file in Excel would appear as:
- Save the file in Comma Separated Value (CSV) format. For instructions click here.
- On Mac save the file as Comma Separated Values (.csv).
- On PC save the file as CSV (Comma Delimitated).
Step Two: Enroll Participants through the Classlist Tool.
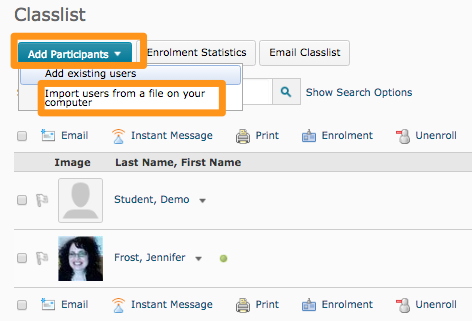 Within SLATE, go to the Virtual Community participants will be enrolled into.
- Select Classlist on the course navbar.
- From the Add Participants drop-down select Import users from a file on your computer.
- Select the Browse (Open File) button.
- Locate the file on your local computer and click Open.
- If you would like to send an email to users select the checkbox to Send email to existing users under Import Options.
- Click Import.
- If any errors are reported, fix the file and reload.
Removing Participants
- See Adding and Removing Participants through the Classlist tool.