To create a discussion forum from the Discussions tool
- From your course navbar, navigate to Communication/Discussions.
- Click New > New Forum.
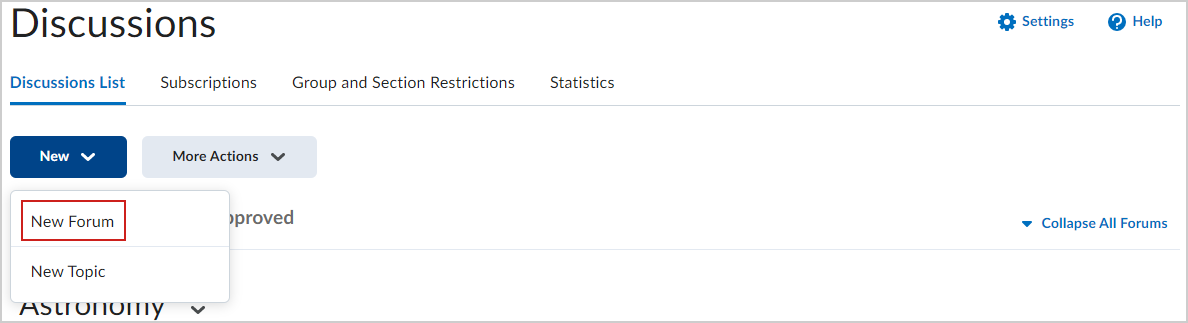
Figure: Click New Forum from the New drop-down menu. - Navigate to the Properties tab of the New Forum page and set the following:
- Enter a Title for your new discussion forum (1).
- Use Brightspace Editor to add a Description (2).
- Click to select additional forum options, including Allow anonymous posts, participation requirements, and Display forum description in topics (3).
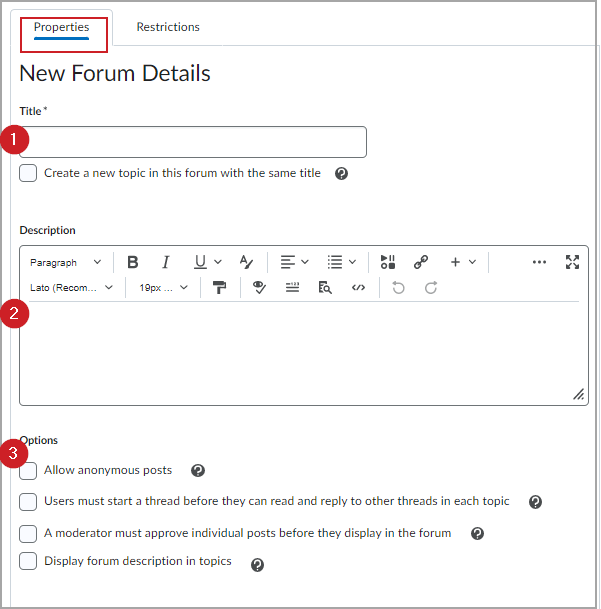
Figure: Set the New Forum Details in the Properties tab.- Allow anonymous posts: Enables users to post anonymously.
- A moderator must approve individual posts before they display in the forum: Ensures that posts are approved by a moderator before they display in the forum.
- Users must start a thread before they can read and reply to other threads in each topic: Ensures user participation by making thread creation mandatory.
- Display forum descriptions in topics: Provides instructors the option to display a discussion forum description within a discussion topic description.
- Click the Restrictions tab and do one or more of the following:
- Under Availability, define the date range when the discussion will be available to users. (1). Availability options specify when learners can access (or view) a forum based on a specific date set by you. For example, you can set a date to make a discussion forum available to learners after the end date for finishing a course module.
- Locking Options specify if learners can post or reply to a forum based on a specific date set by you. For example, you can set a date to lock a discussion forum after making it available, giving learners time to read and understand the discussion forum, but not post replies. You can also set a date to unlock the forum several days later, allowing learners to post their well thought out replies.
- Visible with access restricted before start/end. The forum is visible to learners before or after the start or end date, but they cannot access it.
- Visible with submission restricted before start/end. The forum is visible to learners before or after the start or end date and they can access it, but they cannot post new threads or replies. This effectively makes a discussion read-only.
- Hidden before start/end. The forum is hidden from learners until the start or end date. Calendar events for Availability Start and Availability End are hidden until the start or end date. Notifications are also not sent until the start or end date.
- Locking Options specify if learners can post or reply to a forum based on a specific date set by you. For example, you can set a date to lock a discussion forum after making it available, giving learners time to read and understand the discussion forum, but not post replies. You can also set a date to unlock the forum several days later, allowing learners to post their well thought out replies.
- Under Availability, define the date range when the discussion will be available to users. (1). Availability options specify when learners can access (or view) a forum based on a specific date set by you. For example, you can set a date to make a discussion forum available to learners after the end date for finishing a course module.
- Add automated conditions for access using Release Conditions. (2)
- Apply restrictions to groups or sections. (3)
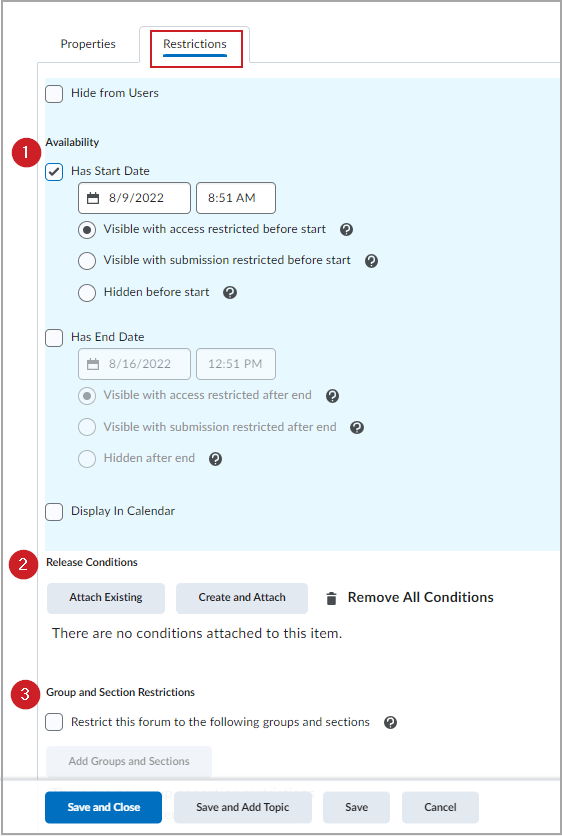
Figure: Set your forum’s Availability, Release Conditions, and Group and Section Restrictions in the Restrictions tab. - Click Save and Close to create the forum; or Save and Add Topic to create a discussion topic within your new forum.

Figure: Click Save and Close to create a discussion forum or click Save and Add Topic to create a new topic in your forum.
You have created a discussion forum using the Discussions tool.