Sharing your ePortfolio Internally
You can share items with other users in your organization by selecting individual users, all users in a course or group you are enrolled in, or a previously saved sharing group.
Assign permissions for a user or group of users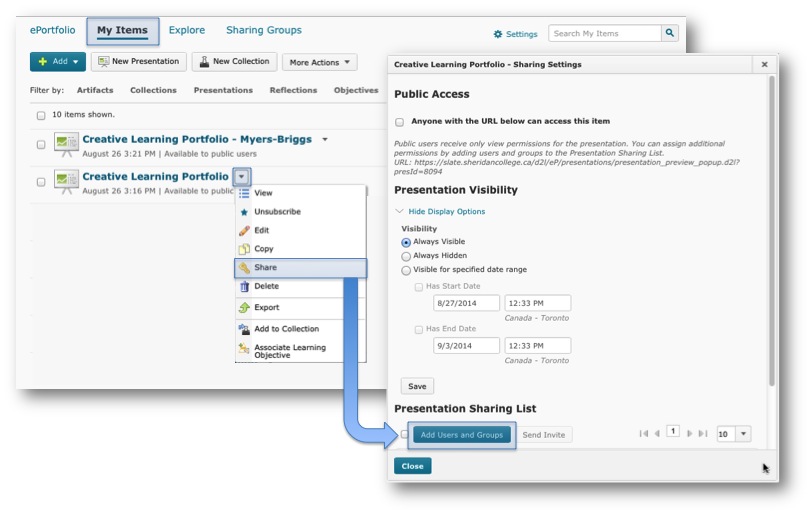
- Within ePortfolio select the My Items tab.
- Locate the presentation or item you want to share and click on the drop-down arrow beside the title.
- From the drop-down menu select Share.
- Select when you want users to see the item in the Visibility section of the Sharing Setting dialog.
- Click Add Users and Groups.
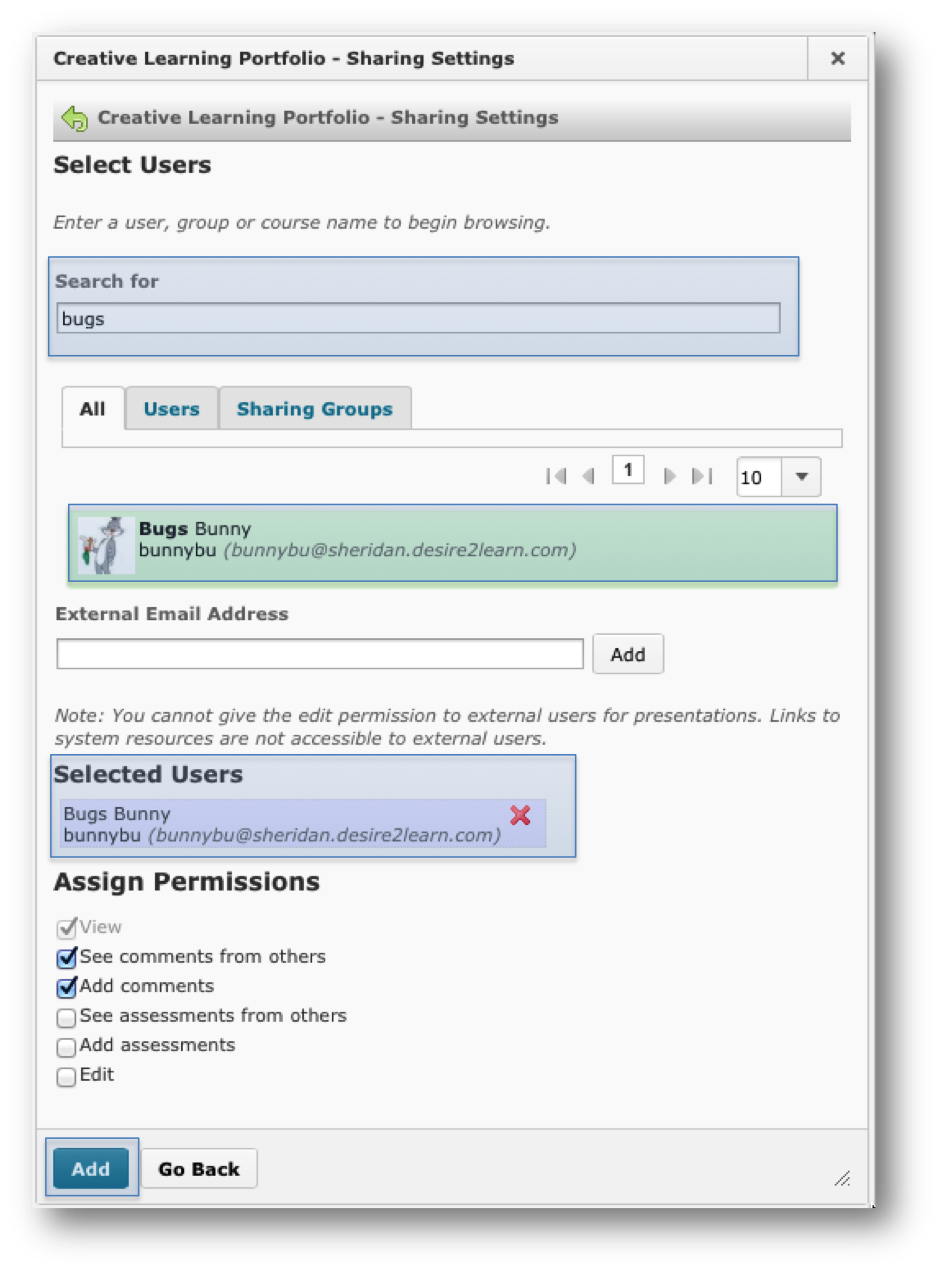
- Browse for the users or sharing groups you want to add.
- Use the Search for field to narrow your browsing results.
- Click on users or sharing groups in the browse listing to add them to the Selected Users list.
- Click the Remove icon beside users or sharing groups you want to remove from the Selected Users list.
- Select the permissions you want the selected users to have and click Add.
NOTE You can adjust permissions for individual users by clicking the Edit Permissions icon beside their name in the Sharing List grid. You can adjust permissions for sharing groups you’ve created by clicking the Edit Sharing Group link beside their name in the Sharing List grid.
- If you want to send an invite to specific users in the Sharing List, select the check boxes beside their names and click Send Invite.
- Click Close.
Note: When you share items in your ePortfolio an icon appears beside the item indicating the number of people the item is shared with. Clicking on the icon will open the sharing permissions:
