Access the Forms Tool:
- Select
 on the course navbar.
 - From the Course Administration area select

Create a New Template:
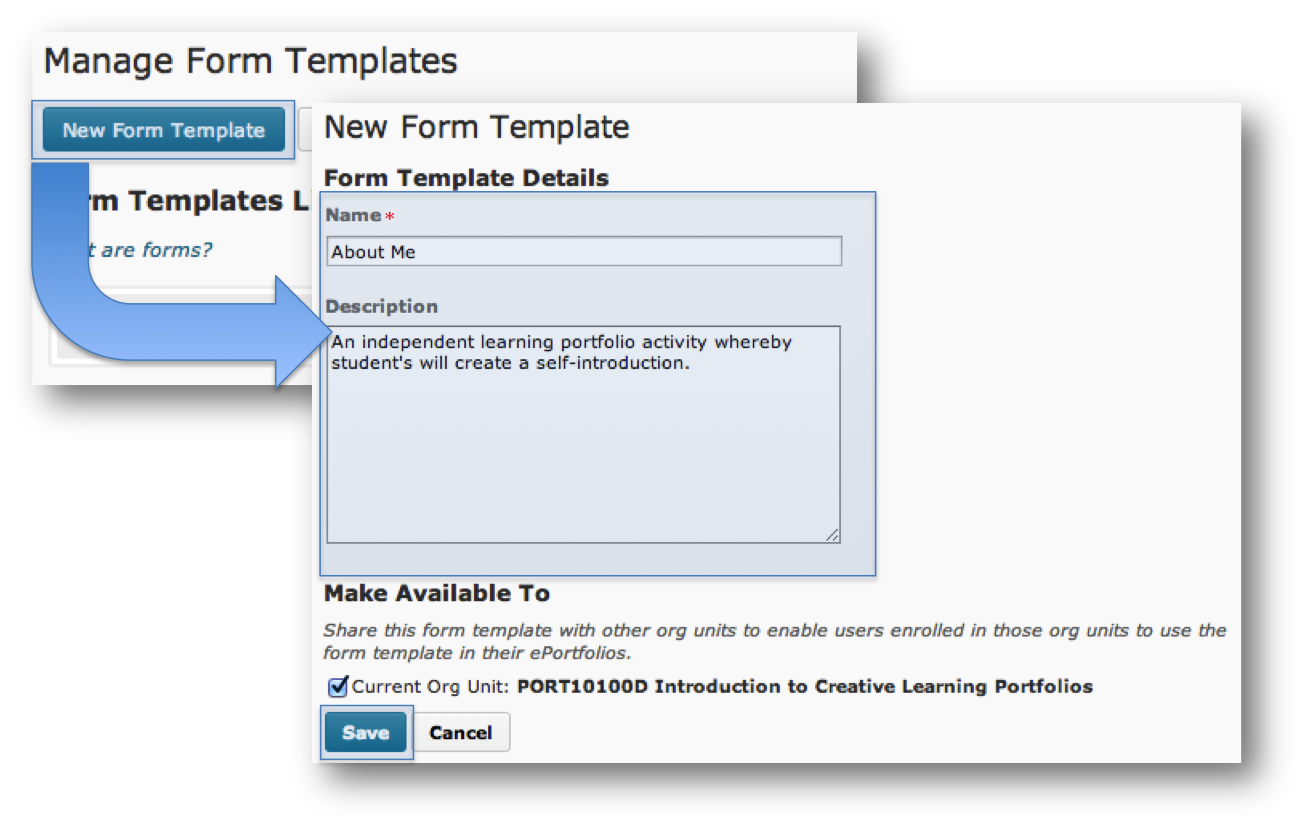
- Under the Manage Form Templates heading click on New Form Template.
- On the New Form Template page enter a name and description for the form.
- To make the form available to students, click the box under Make Form Available.
- Click Save.
Adding Fields
The content fields are the actual fields users fill out. There are two types of fields: system fields and custom fields.
System Fields:
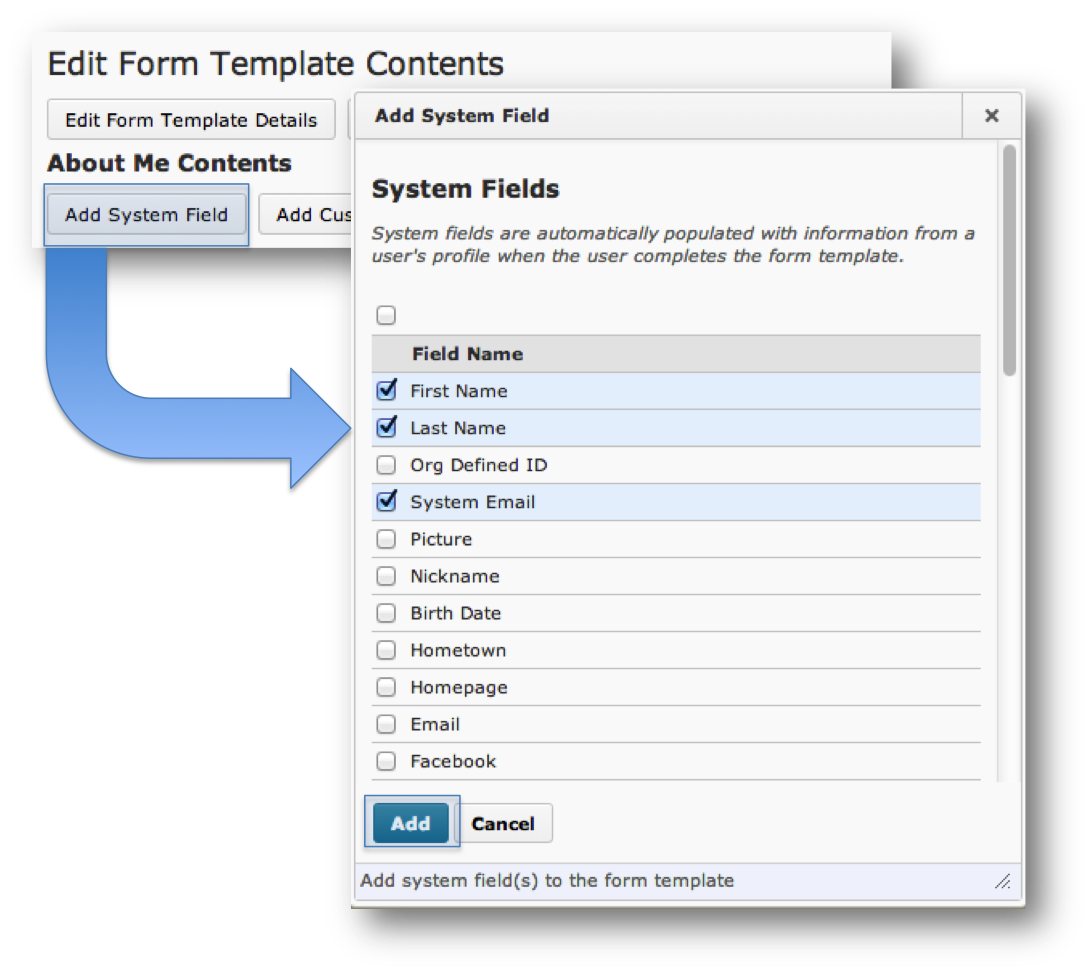
System fields automatically populate with information from a users profile. For example:
- First Name
- Last Name
- Email Address
Adding a System Field:
- On the Edit Form Template page select Add System Field.
- A pop-up window will display. Select the checkboxes beside the System Fields you want to add to the form template.
- Click Add.
Custom Fields:
Custom fields allow users to fill in content based on fields you define. There are several different options for creating fields including: drop-down lists, radio button list, check box list, text input – simple text, text input – formatted text, number input, date and time input, information, file upload, rubric evaluation and ePortfolio item link.
Adding a Custom Field:
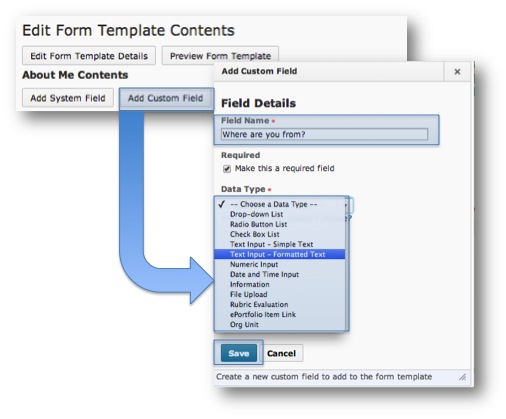
- On the Edit Form Template page click Add Custom Field.
- A pop-up window will display. Enter a Field Name.
- Select the Make this a required field check box if you want to make this field a requirement.
- Choose the Data Type for the field.
- Fill in additional information based on the data type.
- Click Save.